
Can AI Change the Camera Angle of a Photo? A Practical Workflow
Learn when to fix a viewpoint with AI instead of regenerating the whole image, and how to turn that better angle into a stronger still for video.
Sometimes the image is already close. The subject works. The styling works. The real problem is the viewpoint.
When that is true, rebuilding the whole frame is often the wrong move.
That is where Change Camera Angle with AI becomes useful.
Instead of rebuilding the whole image, you keep the subject and change the camera position first.
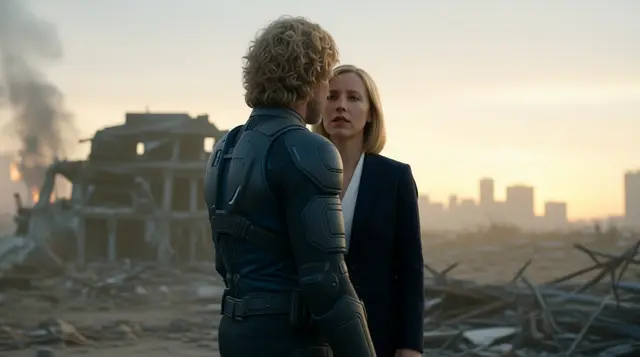
This is the kind of source image where an angle tool makes sense: the subject already works, but the viewpoint still needs help.
When this is the right tool
Use a camera-angle workflow when:
- the subject is already right
- the styling and environment are already close
- the problem is framing, perspective, or emphasis
- you need a better still before moving into video
A simple test helps here: if you can describe the fix in camera language, this workflow probably fits.
Examples:
- “make the subject feel more dominant”
- “push the frame into a 3/4 view”
- “show the product from the side instead”
- “give me a cleaner top-down read”
If the real request is about changing the subject, changing the styling, fixing identity, or rebuilding the scene, the problem is no longer just viewpoint.
That is also what separates this article from the broader “multiple angles from one image” workflow. This page is about fixing or upgrading the viewpoint on one usable frame. The companion article covers generating several alternate views from one approved still.
Why not just regenerate the whole image
Full regeneration often resets parts of the image that were already working.
That creates two common failures:
- you lose the original subject fidelity
- you introduce a new round of style drift
If the viewpoint is the weak point, a dedicated angle step is cleaner than asking a brand new prompt to rediscover the same scene.
What the tool should help you change
The best angle corrections are usually simple, specific, and purposeful.
Eye-level to low-angle
Use this when the subject feels too passive, too small, or too neutral.
This change usually adds authority, scale, and more foreground presence. It is especially useful for hero talent, ad spokespeople, founders, and product shots that need more punch.
It is a good correction when the existing frame already works, but the subject does not feel important enough yet.
Watch out for distortion. Limbs, jawlines, or background perspective can become exaggerated fast, especially if the original frame was not designed for a dramatic low-angle read.
Straight-on to 3/4 view
Use this when the image feels flat and you want more depth without rebuilding the whole shot.
A 3/4 view usually adds dimensionality and helps the frame feel less static. It is often a good move for portraits, fashion, character stills, and any subject that looks too rigid front-on.
It is often the cleanest fix when the subject is already approved, but the shot still reads too much like a placeholder.
Watch out for facial drift or symmetry loss. A better angle is not useful if the subject stops looking like the approved frame.
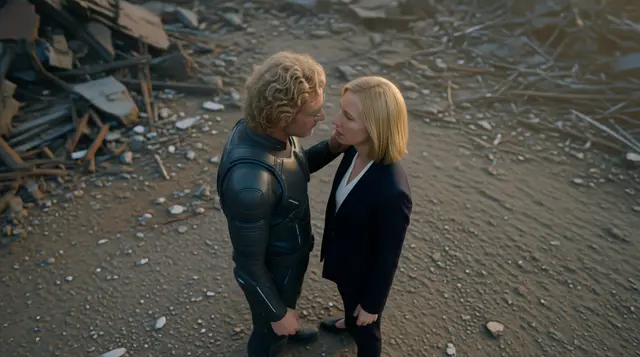
Hero frame to top-down
Use this when clarity matters more than cinematic force.
A top-down move can make layouts, products, desk scenes, and food compositions much easier to read. It is a good correction when the original frame hides structure or makes the contents of the shot harder to parse.
It is especially useful when the goal is quick readability rather than drama.
Watch out for emotional loss. Going top-down can improve readability while removing presence or drama.
Product front view to side view
Use this when the front-facing shot is approved, but you still need to reveal depth, edge detail, materials, or packaging form.
This is especially useful for ecommerce, packaging, and commercial stills where one product view is not enough.
It helps most when the original shot proves the concept, but not yet the physical shape of the object.
Watch out for warped branding and label readability. If the front view matters because text or compliance details must stay clear, do not sacrifice that just to create more angle variety.
Those changes affect more than composition. They change scale, emphasis, readability, and how the final frame will behave if it later becomes motion.
The cleaner move is to preserve the approved subject, then improve the viewpoint before the frame enters the next stage.
How to tell the corrected angle is actually better
The goal is not to make the shot more dramatic by default. The goal is to make it more useful.
A corrected angle is usually better when:
- the subject reads faster
- the frame gives clearer emphasis to the important object or person
- the image still preserves the approved subject and styling
- the composition leaves more room for motion or downstream editing
- the new viewpoint still works in the crop or aspect ratio you plan to publish
Where it fits in MaxVideoAI
A practical way to run this inside MaxVideoAI is:
- start in Change Camera Angle with AI
- refine the winning still in Image if needed
- move the selected frame into Video
If you need a motion engine after that, the Model Hub is the easiest place to compare options like Veo 3.1 and Kling 3 Pro without leaving the workflow.
Best use cases
This workflow is especially useful for:
- storyboards and previs when you need to improve shot readability before sequence planning
- product and ecommerce stills when the product styling is approved but the viewpoint is weak
- social content when the first frame needs more emphasis before motion or vertical adaptation
- ad creatives when the concept is approved but the shot itself still lacks impact
What to avoid
Using angle change to fix every problem at once
If the subject, styling, or identity are weak, fix those first. The angle tool is best when the viewpoint is the part that needs help.
Over-dramatizing a frame that needs clarity
The strongest angle is the one that serves the job, not the one that looks most aggressive in isolation.
Sending an ambiguous or weak still into video
The better the still is before video starts, the easier the next stage becomes.
If the new angle still feels unclear, unstable, or visually unresolved, it is not ready to become a first frame yet.
Using angle correction when the image actually needs a rebuild
If the subject is wrong, the styling is wrong, the identity is drifting, or the composition is fundamentally broken, a camera-angle pass is not enough.
At that point, rebuild the still first. If what you really need is to compare several different viewpoints from one approved source, read How to Explore Multiple Camera Angles From One Approved Image instead.
Final takeaway
Changing camera angle with AI is not a styling trick. It is a practical way to improve a usable image before you spend more time or budget downstream.
Use Change Camera Angle with AI when the subject is right and the viewpoint is wrong.
If one frame is already usable and you only need one stronger version of that same shot, fix the angle before you regenerate the whole scene.
If your real goal is to test several alternate views from one approved still, read How to Explore Multiple Camera Angles From One Approved Image.